WEEK 3 - Introduction to colour
Personally, I don't try to match colours for accuracy.
Sure there are all sorts of colour wheels and methods to get it 'right', but colour is affected by ambient light reflecting off and transmitting through an object.
For instance, what colour is a mirror or a pane of glass?
'Skin tone' is a good example.
If you hold a piece of skin up to the light it is opaque with not much natural colour, but when you look closely at an area like the back of your hand you can see the colours of blood vessels, veins, reflected lights, etc - a whole plethora of blues, greens, reds, yellows, greys and purples.
So I regard the choice of colours as another stage of creativity.
When starting with colour I like to use soft pastels which blend nicely with your fingers.
I suggest limiting the palette to 5 colours as a maximum allocating them to different tones, then draw with them in the same way as charcoal.
If the object is hard - glass, china, etc - leave the lines hard, but if it is smooth - skin for instance - smudge & blend the colours together. Try to 'feel' the surfaces and their textures as they develop.

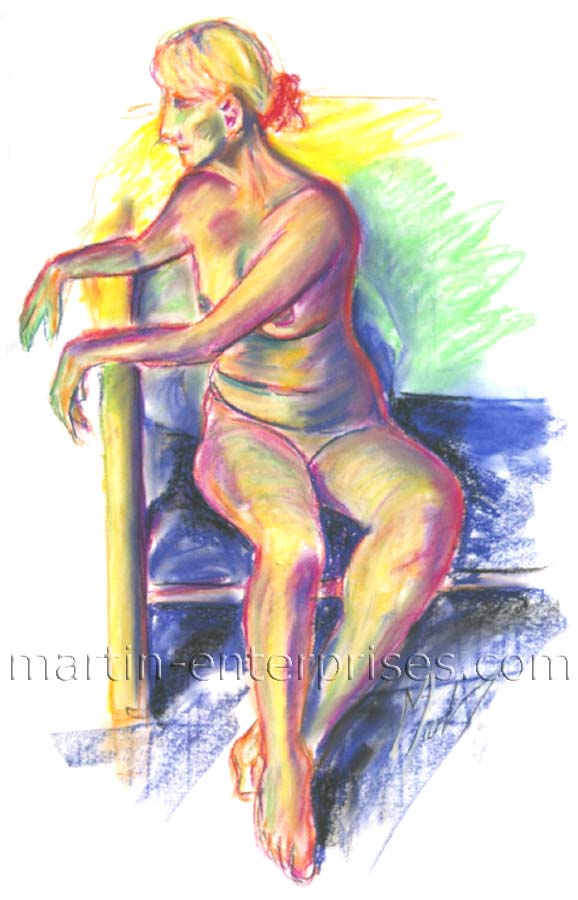
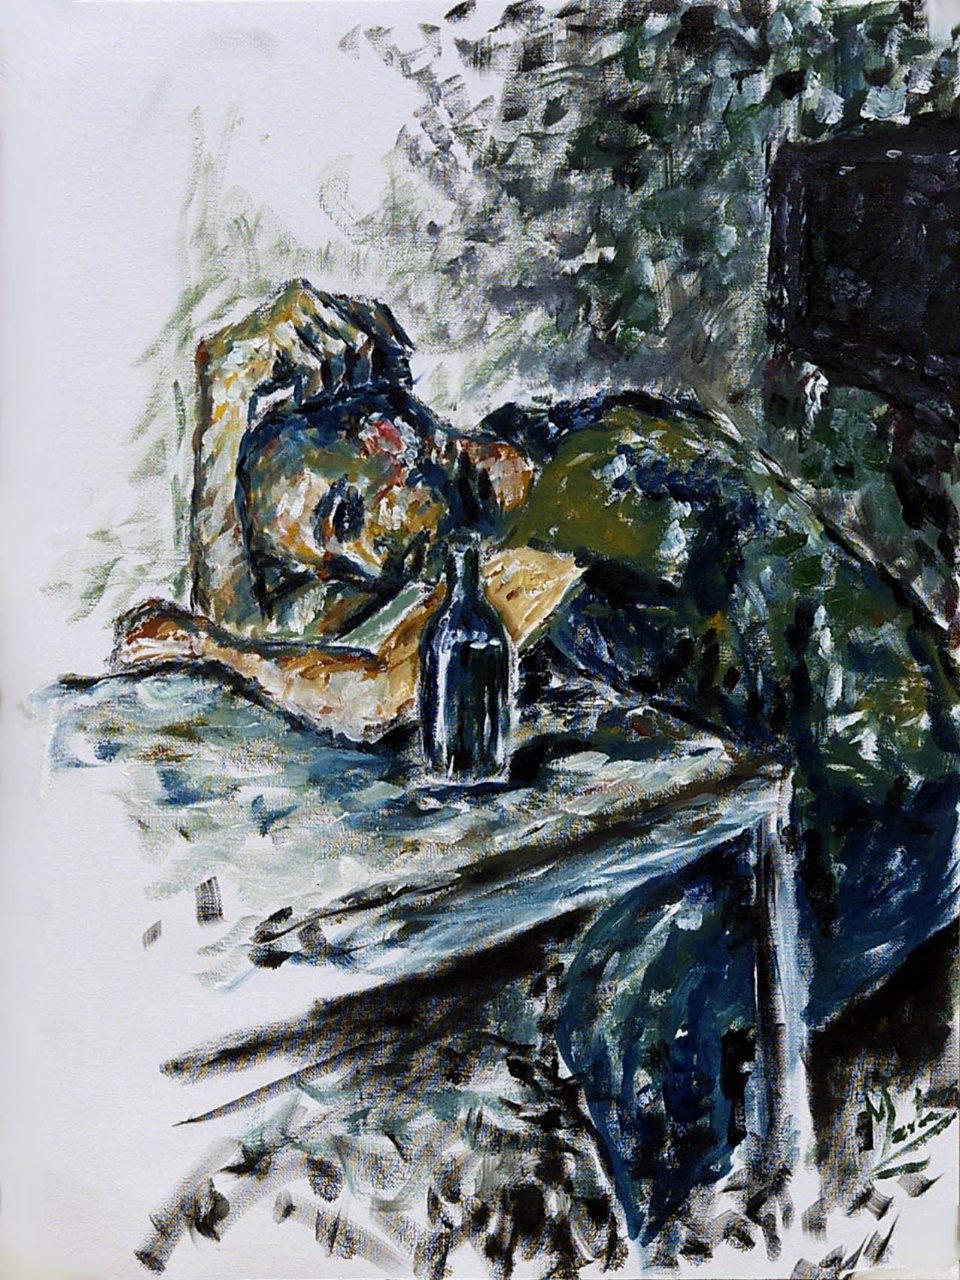
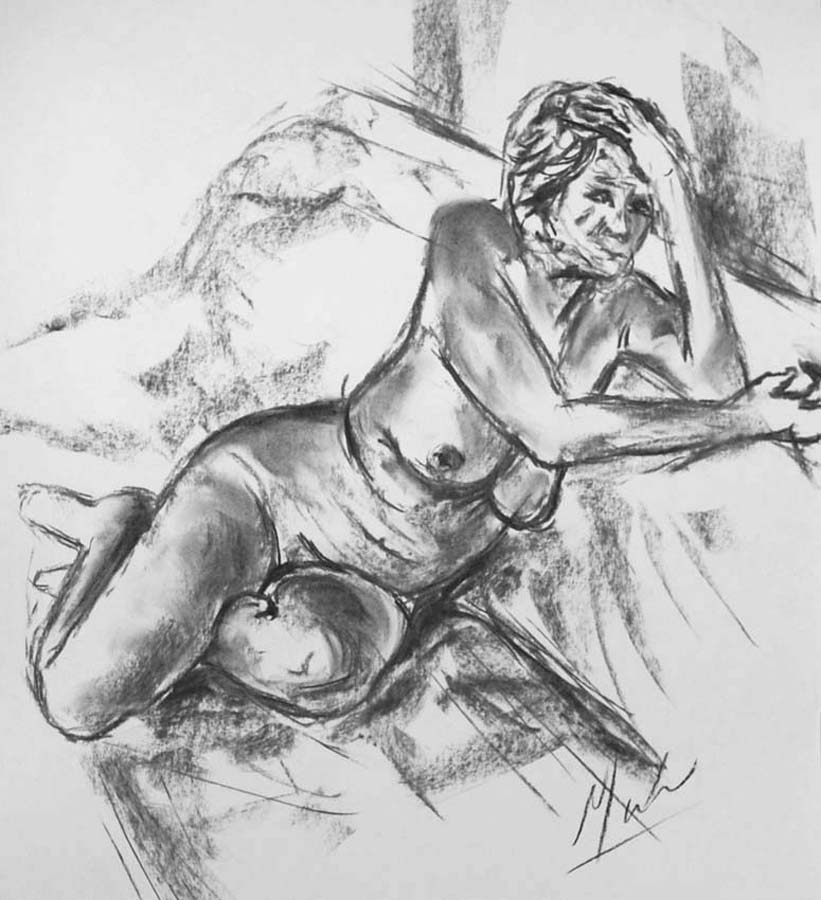
Here is one of my pastel nude studies using five colours - red, green, yellow, blue & black.
And although individually none of the colours might be regarded as 'flesh tone', I think the result looks a little like skin colours perhaps?
Of course when I drew this picture of Cheryl, it was very important for me to draw what I was actually seeing rather than what my mind might tell me.
In this case I knew her thighs were the longest bones in her body, but because ithey came towards me it didn't look like it. (This is called foreshortening - which I mentioned last week too - & we'll deal more with that next week.)
So to draw her legs I looked for and made use of the 'negative spaces' we mentioned last week.
In this picture I used the shape between the model's right leg and the sofa edge to help as well as the 'negative space' between her legs.

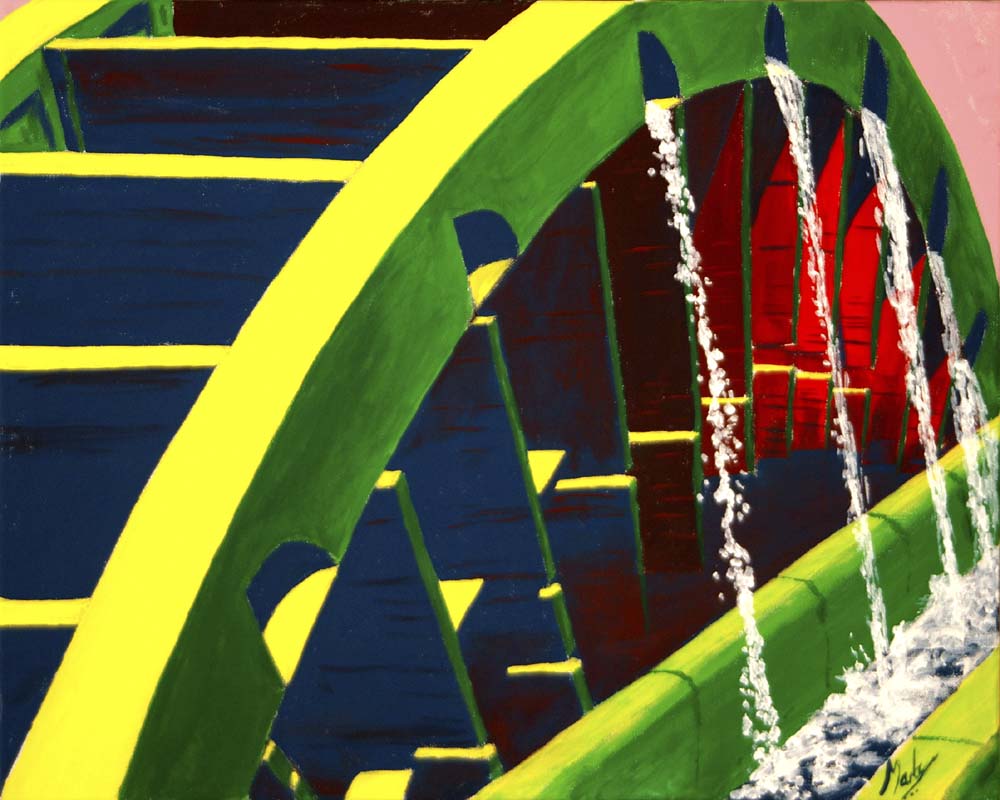
But getting back to colour, this is an interpretation I did of the waterwheel in Rojales in acrylics using my selection of colours carefully chosen to represent 'life', heat & cold.
And my limited colour selection of red, green, yellow, blue & white was laid straight onto the canvas with little blending before hand on my palette.
But my preferred medium is oils as they can be blended on the canvas in the same way that pastels can on paper, and people coming to my course will have the opportunity to try them.
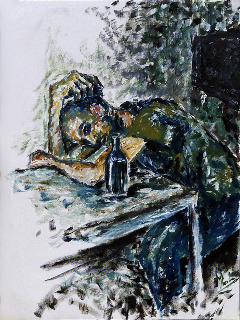
Here is a portrait I painted in oils from life of Stuart using pure colours spotted onto the canvas with just minimal blending whilst the paint was still wet on the canvas - called 'wet on wet' or 'alla prima'.
These notes form the basis of a 6 session course designed to help beginners learn to create for themselves from life, teaching basic drawing and painting skills using still life, locations, portraits and life drawing using pencil, charcoal, pastels & oil paints.
|
WEEK 4 - Perspective &: Foreshortening
Have you ever stood on a railway bridge and seen the how the rails disappearing into the distance seem to meet on the horizon?
This is called 'geometric perspective' and it was Euclid that came up with the geometric interpretation that parallel lines meet at infinity - or the horizon.
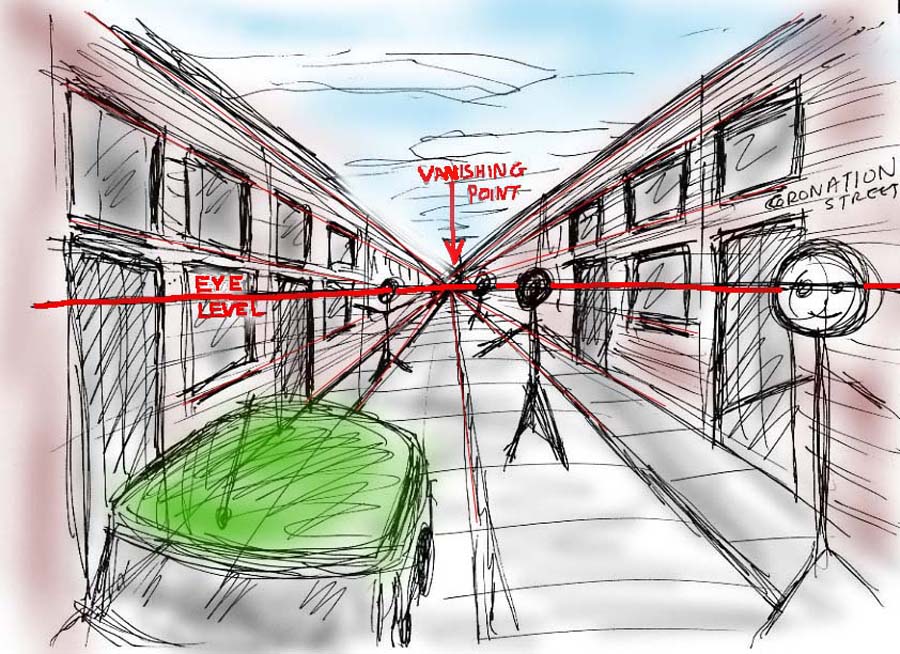
Let's imagine we are on a straight street of parallel terrace houses, the lines through their roofs, windows, fences, pavement etc will all meet on a point on the horizon.
So we first draw a horizon line across the paper - this will be eye-level and therefore if we are standing, will be about 5' 3" above the ground perhaps and everything that is above eye-level will be above this line.

In the attached sketch I have drawn a narrow imaginary street and even people in it to show that, assuming they are roughly the same height as me, our eyes are all at the same 'eye' level - the horizon.
The point where all the lines meet is called the 'vanishing point' and when we come to drawing outdoors we will find there are many vanishing points - all generally meeting on the horizon of course - because roads don't tend to go in straight lines and we may be seeing 2 roads anyway!

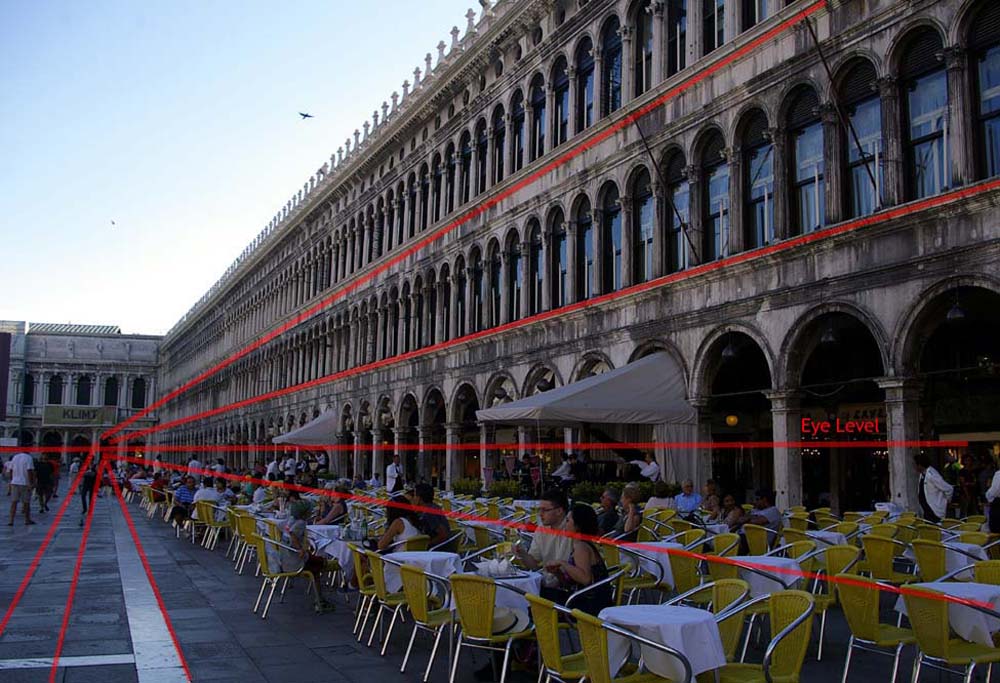
Here is a photo taken in Venice's Saint Mark's square that shows it well, despite the building not being perfectly straight and the slight 'barrel' effect of the camera lens.
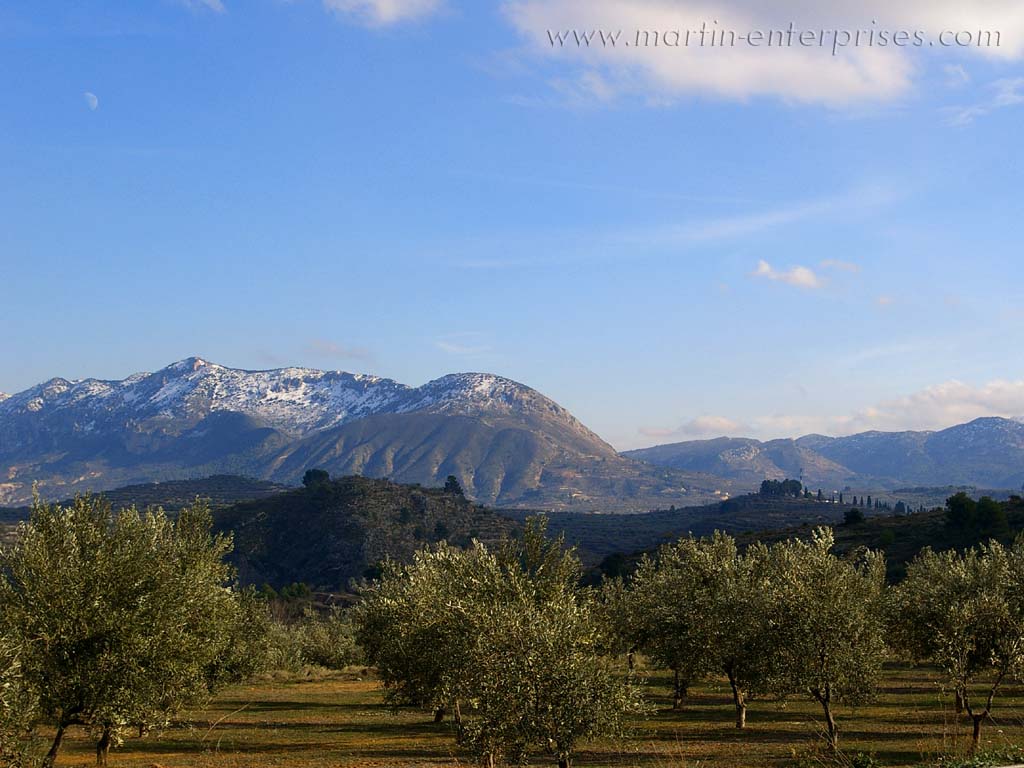
And then there is 'aerial perspective' - a phrase first coined by Leonardo da Vinci who examined how objects became bluer and hazier with distance saying: "Thus if one is to be five times as distant, make it five times bluer."
 This photo in the mountains above Alicante clearly demonstrates this which is due to the water vapour in the air and the way it refracts light.
Foreshortening is a continuation of perspective and is a term used when something coming towards us looks shorter than it actually is.

As I said last week the thigh bone is the longest bone in the human body, but if we are drawing someone with their knee towards us, the thigh becomes wider than its length and in this sketch of mine with model Vita, it almost disappears completely.
This leads us on to drawing the human form, but first we will go on location to draw & observe the effects of perspective first hand, and the next studio lesson will be on portraiture.
HOMEWORK
Get out on the street where you live and start looking for the converging lines, vanishing points and horizon.
|